Showing posts with label FAQ. Show all posts

Tuesday, September 13, 2011

New Works & Crayon Commissions

Slumber
I have some new works available on my website.  Please go check it out.

colors
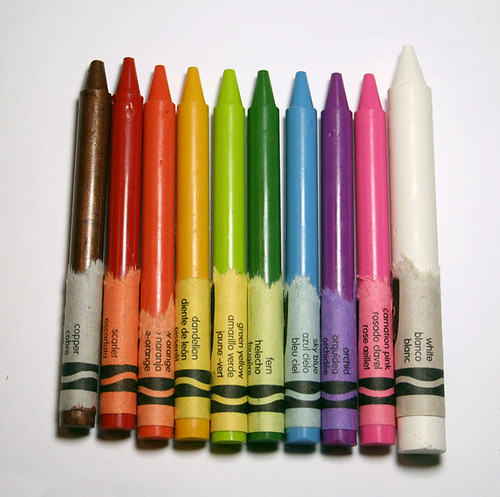
I've also received a lot of emails inquiring about the carved crayons.  I do take commissions on crayon carvings, they start at $350USD for single colored crayons and up to $600USD for multicolored crayons with highly complex designs.  The turn around is about one week for 1-3 single colored crayons, this is not including shipping time.  It may take longer depending on what is requested.  I usually work from the Crayola 64 pack and the bright "fruity" colors work best.  I like to have a good face pic and an overall body shot of my subjects for proportion and clothing reference.  I love special or unusual requests, I see them as a good challenge.  Feel free to contact me if you have any inquiries.

Sunday, April 11, 2010

Tools FAQ

I can go anywhere and work.
Continuing with the FAQ's...
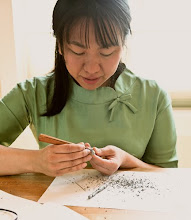
The tools I use in my embroideries are very simple and commonly found.  A majority of the work is done with these 3 items you see in the picture.  I can literally take it anywhere and work!

When it comes to trimming thread I greatly prefer using snips (Nigiri-Basami) to scissors.  They cut much closer and with more precision.  If you want to try out this delightful tool you can purchase one at Ichiroya.  I stumbled onto their website years ago and found Yoshimi Fujiwara's work.  I always appreciate knowing the person behind the product, especially when they're as dedicated as some of these Japanese artisans. 

16 Things
When it comes to crayon carving I use a 4.5mm Hangi To from McClain's in Oregon.  These are for woodblock carving, but they work perfectly for my purposes.  I've tried using Exacto's too but they're too thin and too sharp often resulting in a snapped crayon.  I also have a hard time carving curved surfaces with Exacto's.

On a side note I've been dying to try out some of these needles made in Kyoto... but I can't quite decipher what I need from the info on the page.

Wednesday, March 31, 2010

Embroidery FAQ Part 2

Silk on porcelain
The most asked question I get is, "How do you get the drawing on the bowl?"  So I decided to document the making of piece from start to finish. Here is Part 1.
After I finished with the embroidery I play around a bit with the composition.  

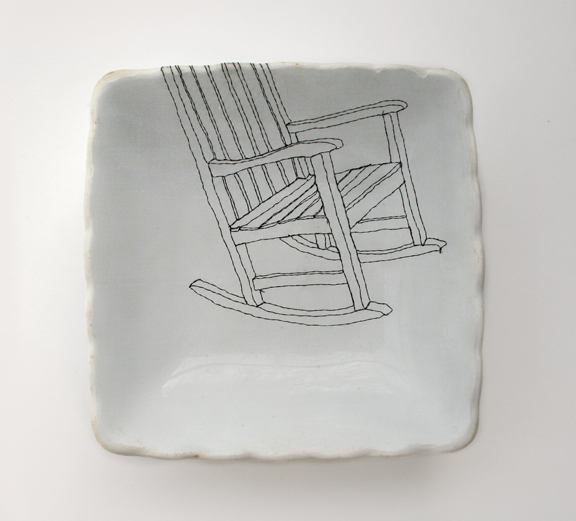
Rocking Chairs
Here are a few examples of what I could have done.  It's amazing what a tiny shift can do to change how the piece is interpreted.  Seeing these photoshopped together I have an urge to do a series of based on chairs!


Gluing
When I've decided on the final composition I sand and apply a thin line of glue to the bowl's rim.  Then I gently place the silk on the bowl.  This part requires a lot of precision because you can only do it once.  I can probably wash the glue off before it dries and redo this step, but the fabric might warp from the moisture or I risk damaging the embroidery in the washing process.  I use a PH neutral PVA glue, it's used in a lot of bookbinding applications.  It's archival, dries flexible, won't yellow or crack and has great adhesion properties.  I've used this glue since 2005(?)... and my first few pieces still look the same, no apparent aging/yellowing or cracking. 

I've read up on a few discussions on how all PVA glue (white glue AKA Elmer's Glue) are the same.  I assure you they are not!  There are definitely professional grade glues that are safe for your work and others that are cheapo's.  PVA glue is probably the least toxic as opposed to epoxies.

more gluing
I brush on an additional layer of glue to the silk surface, this insures even coverage.  I let the glue dry for a few hours and trim the excess.  And that's all folks!

My Mother's Mother
This is the finished piece.

Thursday, March 25, 2010

Embroidery FAQ Part 1

The plate
The most asked question I get is, "How do you get the drawing on the bowl?"  So I decided to document the making of piece from start to finish.  This is a current commission I'm working on for Kathie.  The square bowl belonged to her grandmother, who received it from her mother. 

sketch for Kathy
I usually start by sketching on a sheet of drafting velum.  When I'm happy with the sketch I overlap it with the dishware and move it around to select my composition.  Then I mark the boundary of the porcelain by rubbing a crayon along the edge.  This mark tells me where to embroider.

_MG_6005
A piece of silk is pinned to the velum and I embroider on silk.  I like to slip white paper under the velum to help me see what I'm doing.  I don't use a hoop or stretcher, they tug at the fabric too much.  It took a lot of practice stitching to get the right tension so I don't warp the fabric too much.  Although there will always be some amount of wave and puckering, it's all a part of the artwork.  The fabric also tends to "breath", changing as the humidity and temperature changes.  Sometimes there's more slack and other times it's tight as a drum skin.  But most of the time these changes aren't noticeable. 

Stitch work
A close up shot of the stitching.  Most of the linework is done with a simple running stitch.  Because the fabric is so sheer there's no need to double back to create a solid line.  *Doing a running stitch on a solid fabric would look like a dotted line.*  This method of working reminds me a lot of contour line drawing exercises back at school.


Click here for Part 2!