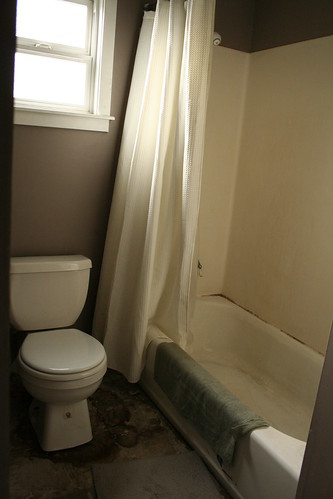
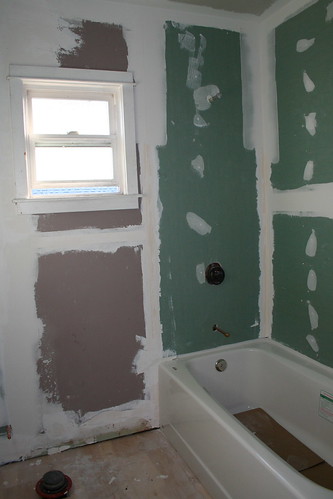
I think the most satisfying room to remodel was the bathroom. This was the state of it when we bought our home. I called it the murder bathroom... it's probably comparable to the
Trainspotting bathroom on the yuck factor. We have 2 bathrooms, but this the main one we use. It's also the one that our guests uses, so it has to be easy to clean despite daily use. It's also a small space, about 6'x9' with very little room for storage. There were some huge challenges to making this a livable and comfortable space.
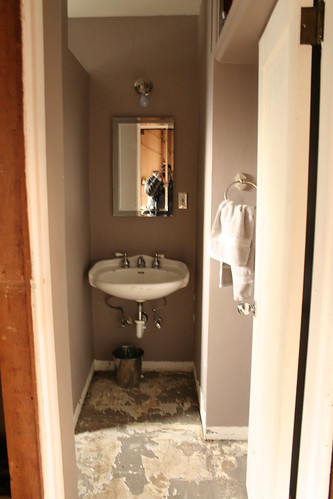
This small bathroom was made smaller by a divider wall separating the tub and sink. It also had built-in overhead shelves. It was a disgusting claustrophobic mess. We decided to tear everything out and build it from scratch. The divider wall came down as well as the built-in shelving.
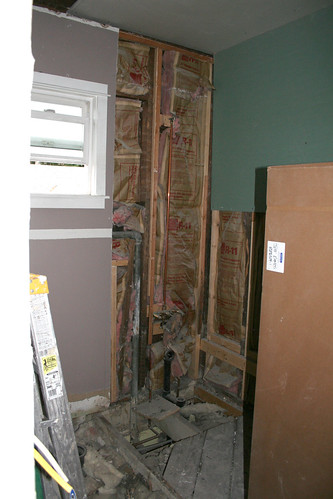
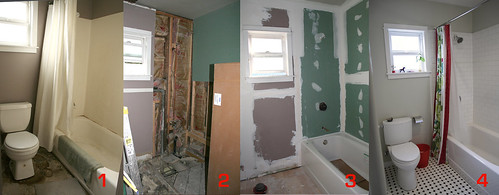
Bathroom torn up. Wall boards, tub, toilet and divider walls removed. I'm sure the walls had soaked up some funk after years of neglect. I didn't want any bad Juju from anything in that room.
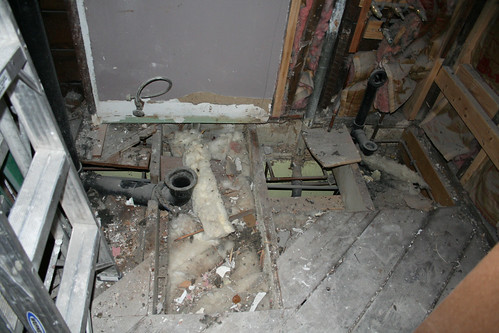
Our contractor Jeff Ramos did an AMAZING job with this bathroom. He rebuilt the sub flooring as well.
New tub, new sub floor & hardi-board wall panels installed. We left the window alone along with the wall panel that it was on. There's no reason to disturb it.
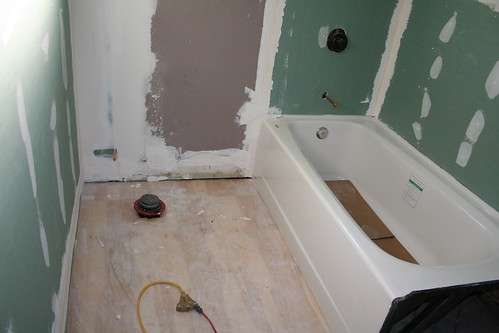
New tub and floor. We also moved the left wall out 6" to gain a little more room between the tub and toilet.

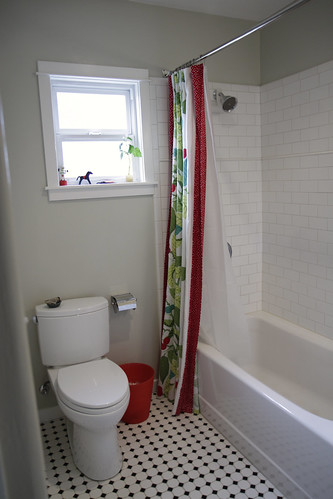
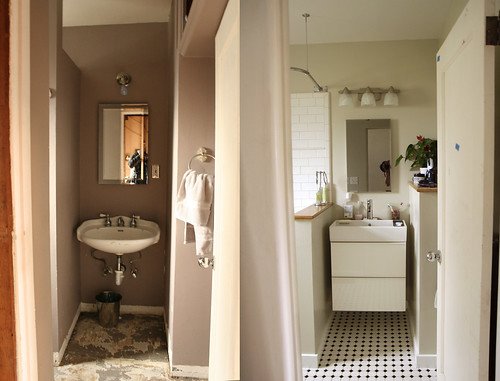
Tada the newly finished bathroom! We took out the divider wall and made a half wall to separate the tub and sink. It gave us a lot more light and also a ledge shelf to put stuff on. The medicine cabinet and light fixture was left here by the old owner. It fits in pretty well. We also removed a section of the wall to the right of the sink, giving us more elbow room and another functional shelf!
The sink, faucet and sink cabinet is from Ikea. We had absolutely no storage in this bathroom. This little drawer unit holds everything we need! It's amazing! The floating cabinet also gives the illusion of more space.
This is a very relaxing space to be in. Many hours are spent here soaking in the tub playing Nintendo DS games! :P
The wall tiles are porcelain subway tiles from Lowes. It's white with antique white grout... there's a huge debate on what color grout to use with white subway tiles. I feel it's best to use a color that's slightly darker, but not too dark. You want to retain the tile subway pattern. A white grout will make your pattern disappear and a dark grout will be too overpowering. I used antique white grout with the b&w floor tiles too.
Our toilet is a Toto Drake II, with cyclone flushing technology. OK, sorry for any of you that might be grossed out over toilet talk, but I have to geek out for a moment. This is the best toilet EVER! It's a bit pricier than most systems you'll find at the box stores, but well worth it. We've had it for over a year and it has worked flawlessly, every flush. We don't even have a plunger and haven't needed one. It's also very "green" having a 1.28 gallon flush. I did weeks of research after finding this baby. The people at Toto knows their stuff. Here's a informational video Toto did to show you how it flushes:
http://www.youtube.com/watch?v=YugiNeWIlME
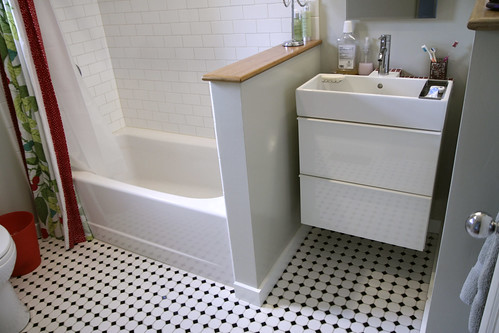
This is an Ikea
Lillangen sink paired with the
Godmorgon cabinet. I like the contemporary feel of the Lillangen and the little accessories it comes with is wonderful as well. This sink serves as a shelf, soap holder and organizer. When you're in a tight spot you need every inch to work for you. We were dead set on having this sink. We also REALLY needed a cabinet with drawers to keep all of the bathroom stuff... q-tips, hair dryer, brushes & what-have-you. Our needs really limited our design choices, but it's a fun challenge to have.
While at Ikea we saw the Godmorgon cabinet and knew that it would be perfect for our storage needs. I stupidly assumed that all Ikea sinks were designed to be paired with Ikea cabinets. We bought them both and when we went to install the sink realized that the sink was too short for the cabinet! ARG! The sink is 16"deep while the cabinet is 20"deep. We really wanted that sink and we needed that cabinet. So we had to make it work... Ikea hacking, another favorite activity of mine.
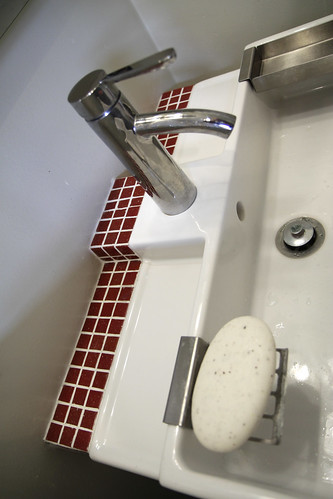
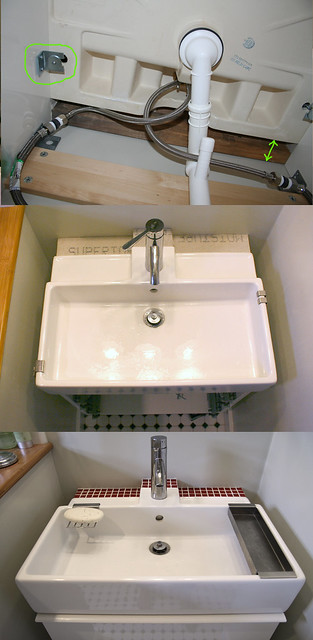
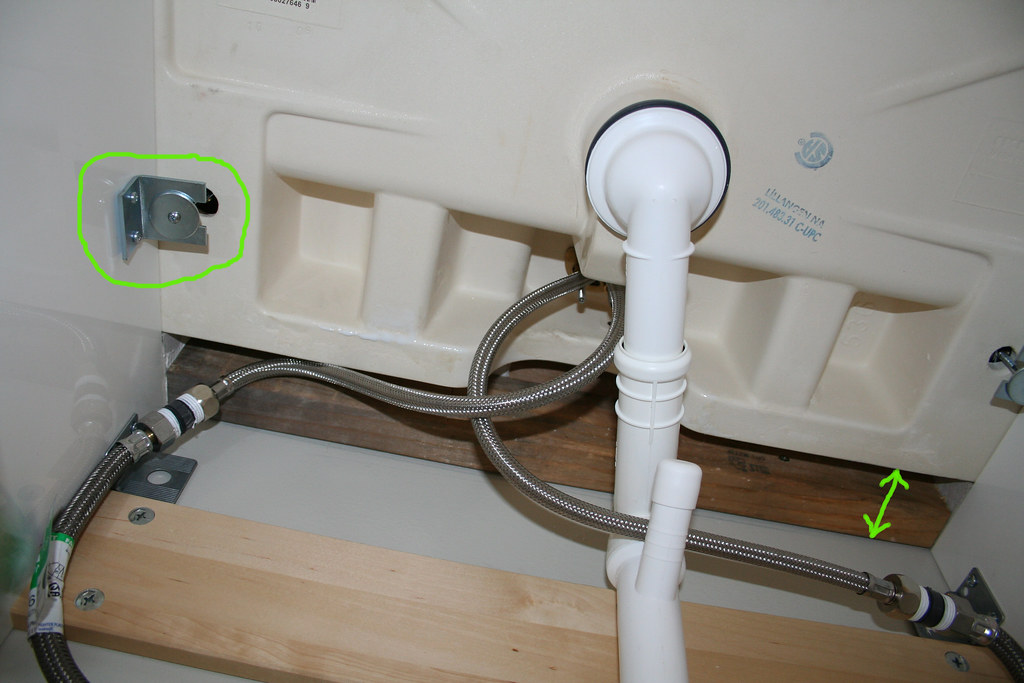
We just scooted the sink out by 4" so the edge of the sink meets the edge of the cabinet. We secured a piece of 2by4 between wall and the sink to build out a ledge that we tiled. I like the extra depth behind the sink and it gives me an opportunity to add a splash of color. The metal soap holder comes with the sink! The faucet is also from Ikea.

Here is the underside of the sink. I took this during the installation. You have to drill holes for the sink bracket, it doesn't match up to any pre-drilled holes. You can also see the 2by4 in the back between the sink and wall. The green arrow shows that the sink moved forward.
Here are all of my bathroom remodel pics.
A quick recap with images. Click on them to view large.
Before & After of the sink.
Before & After
A closer look at the sink.


