Showing posts with label Works in Progress. Show all posts

Tuesday, August 17, 2010

The Orr's

Orr
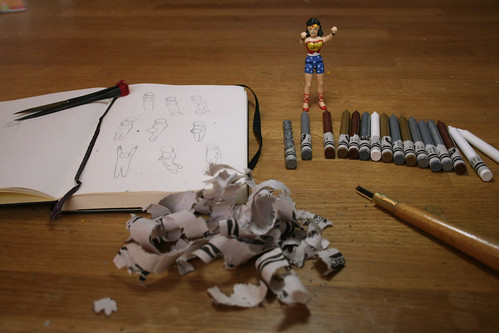
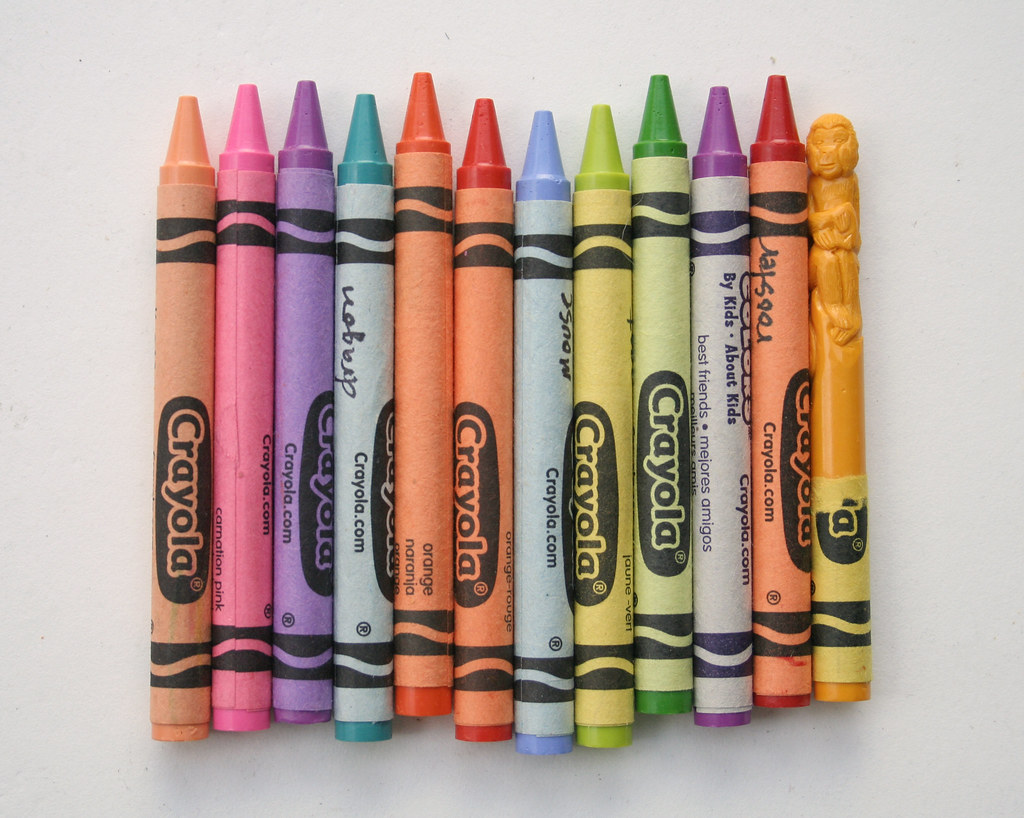
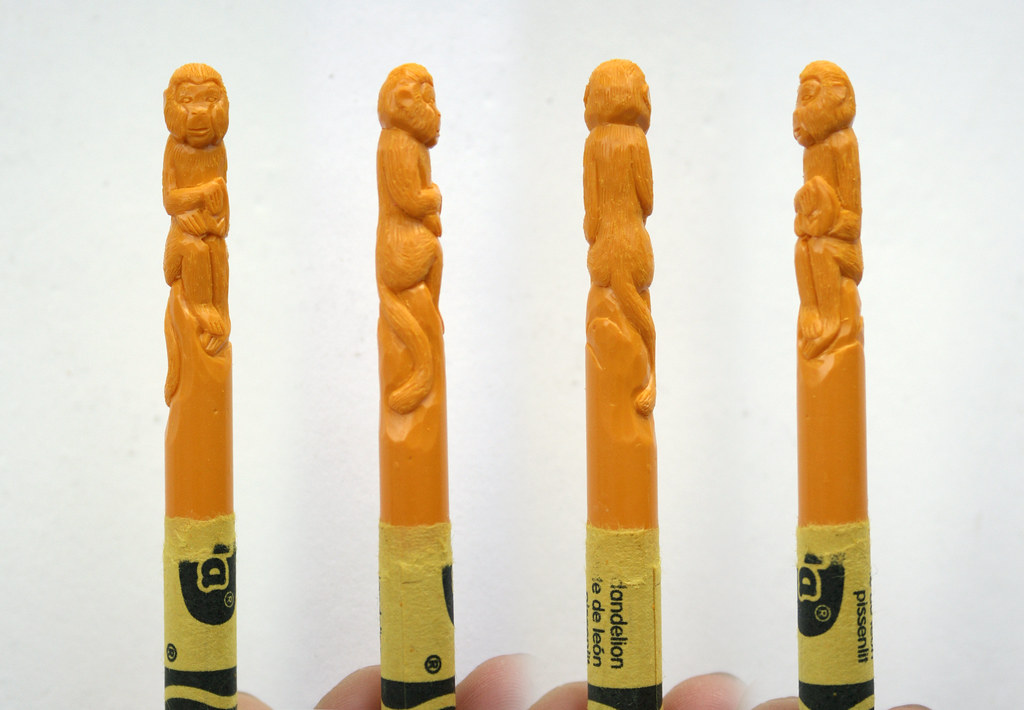
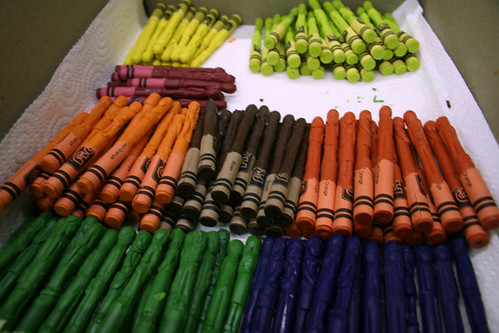
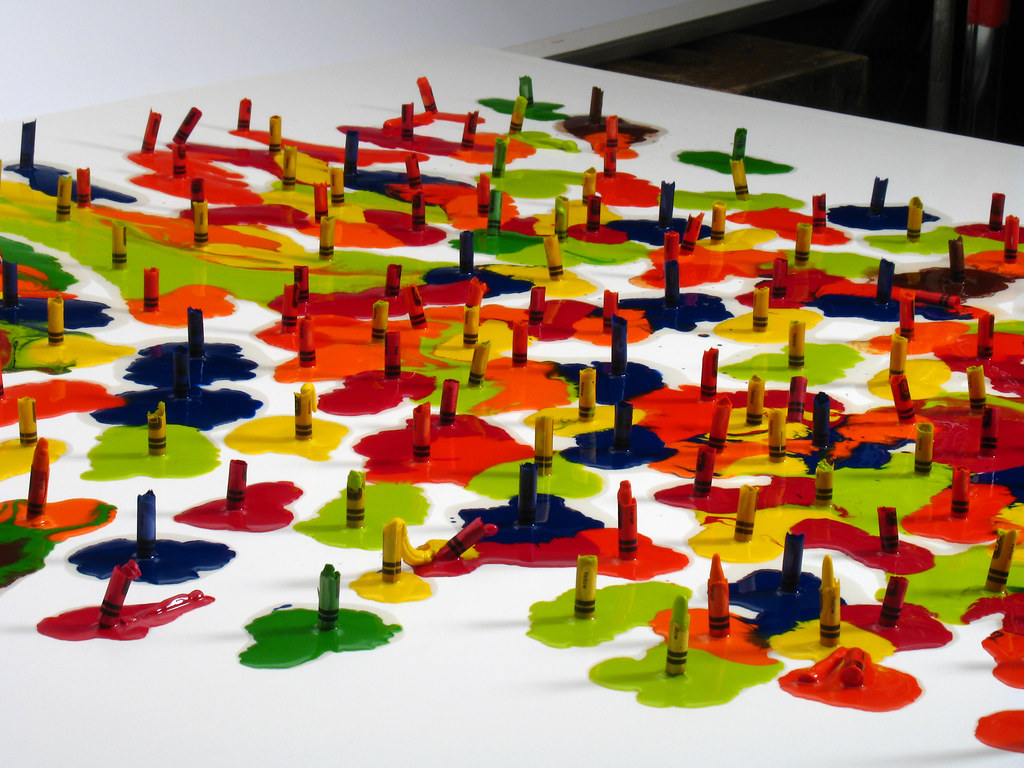
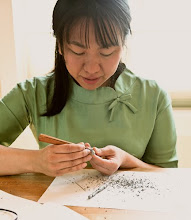
My latest commission for the Orr's.  This was my first time working with Razzle Dazzle Rose.  It's a very fluorescent color, almost impossible to photograph well.  I had to do some major color manipulation in Photoshop to tone it down.  The wax was also very soft and got gummy/sticky when heated by my hands.  It's been VERY HOT in Seattle.  Every couple of minutes I had to quench my hands in ice cold water to keep the temp down when I'm carving.  I usually work late nights when it's this hot.

_MG_8635
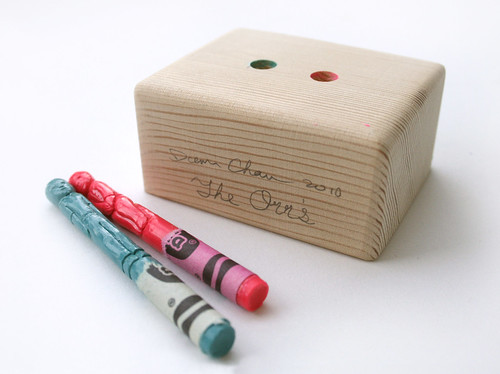
This is my new crayon base.  I like the proportions much better than my old bases.  Before shipping my crayons to their new homes I will usually do a fitting first.  You can see wax residue in the holes.

_MG_8644
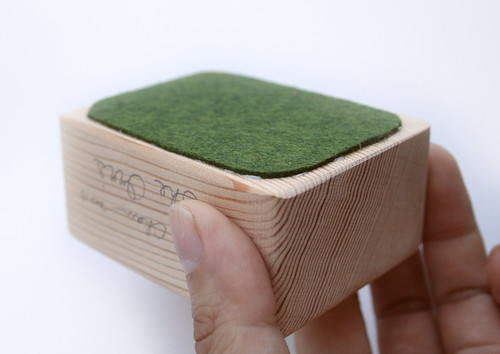
The bottom is lined with felt, an extra little touch. :)

_MG_8640
This is how the crayons are packed for shipping.  They are fitted into "foam coffins" and bubble wrapped then bubble-wrapped coffin is suspended in packing peanuts.  This method has been greatly successful, I've shipped worldwide and none have broken!  *knock on virtual wood*

Thursday, August 12, 2010

Trying to Work

Today I went through some of my clutter and cleaned up/organized a few things.  I've been trying to get back to work lately.  I've had a lot of problems with concentrating on my ideas and with feeling unmotivated.  Probably the biggest cause of this is letting stuff build up around me, both physically and mentally.  Piles of junk mail, old magazines, things I no longer use or need just sitting around.  Worst yet, remnants of half finished projects constantly lingering in my peripheral view.  I keep thinking, "I'll get that to the Goodwill" or "that's going to the dump... I've got to shred these".  Instead of doing it I just keep thinking about it.  I've had this to do list circling in my head with a sprinkling of new ideas that I keep wanting to try.  It feels like the tornado scene from the Wizard of Oz in my head!  I can hear the music now...

Trying to work.
I feel more focused now that a few piles are gone.  It's funny how getting rid of stuff can be so liberating.  Guy and I sat in the garden for a few hours while I looked through some books and did some sketching. 

Tuesday, August 10, 2010

Random Studio Stuff

Little Shelf
Shelf of random things next to where I work.

Spools of color
My color palette of threads. 

_MG_8266
My stash of thrift store porcelain. 

_MG_8268
Shelves of glues, glazes, old art show postcards, toxic stuff and paint.  I used to paint years ago, I still have tons of acrylic paints left from those years.  Surprisingly the paint is still good after 5-6 years of storing.  Someday I'll paint again.
I also have a fetish for glues...

_MG_8269
My father's old text books, some are from college others are from grade school.  Also my husband's grandmother's letters and journals.  It's a nice old dusty smell.

Wednesday, June 23, 2010

Behind the Nike Project

Scattered Crayons
First off I just wanted to say WOW!!!  Holy cow, I didn't expect such an amazing response to this project!  Thank you EVERYONE in Internetland and beyond!  Here is a quick peek at some in progress images.

Wonder Woman Cheering
Right after the Nike Project was confirmed I did a little dance and got right to work.  I started by making a few sketches and peeling crayon labels.  The peeling process has become somewhat meditative.  If I ever end up in an asylum I'll be the girl in the corner rocking back and forth peeling crayon labels.  Wonder Woman was also there to cheer me on. 

Shoe Detail
I made a few partially carved samples including this one.  I wanted to focus on the shoes (naturally), grass texture and the figure's movement.  I've always carved standing figures, this was my first attempt at carving more dynamic movements.  There's only so much you can do within the physical borders of a crayon, but I wanted to see how much I can allude to.

Making copies
No, they're not spooning...
This was also my first time making multiples of one figure.  Next to the major time crunch making multiples was my biggest challenge.  I made a "master" carving and used it as reference for all of the other copies.  I would draw guidelines from one figure to the next and quickly rough out an approximation.  After all of the major parts were in place it was only a matter of refining the details.  The details take time, but it's not as nerve-racking.

Let the Chips Fall Where They May
A friend once compared my carved crayon surface to the facets of a crystal.
Here's what W+K's got to say.  There goes my secret of outsourcing to gerbils!  :P

Sunday, May 9, 2010

This Is What I Live For

I've got a crazy schedule coming up... a HUGE commission.  I'm sure you guys won't see me for the next couple of weeks.  I love and hate working so intensely.  On one hand I get to test what I'm really capable of and push those limits.  On the other hand I'll really miss sleeping. LOL

Work Work Work
This is my work load for the next few weeks.  There are 82 crayons I have to carve by mid June.  This is by far the most I will have done in such a short amount of time.  I can't give more details now... but it rivals the US Cellular commercial!  WOW!

I have one week to make 30 crayons (1st Half in picture), then another two weeks to do the next 30 (2nd Half in picture).  From there I have four days to make 14 (Overtime in picture) and finally another four days to make the last 8 crayons (Sudden Death in pic).  In general it takes me 2-3 hours per crayons... but these will be made in duplicating sets of 6.  I'm hoping the repetition will speed up my process.  I have to make 3-4 a day.  That's 9-12 hours per day 7 days a week for the next few weeks.  Yeah Baby! Bring it on!

Saturday, April 10, 2010

Dorries Lost At Sea

Lost At Sea Peek
A sneak peek at 3 dolls I will have in the "Lost At Sea" exhibition next month at Gallery Hanahou.  This is the evolution of my prototype doll, they've sprouted hair, scales and tentacles!  I'm still working on some final details.  I might also make them a presentation box, but I really don't want to go overboard on this project (no pun intended *snort*).

Test Faces
Here are a few eyes and mouth samples I painted last night.  Thanks to TADA's vote on painting the faces on vs. embroidering it.  I really love how crisp the painted shapes looks and I also have so much more control.  In terms of play value paint can withstand more than stitches can.

Wednesday, March 31, 2010

Embroidery FAQ Part 2

Silk on porcelain
The most asked question I get is, "How do you get the drawing on the bowl?"  So I decided to document the making of piece from start to finish. Here is Part 1.
After I finished with the embroidery I play around a bit with the composition.  

Rocking Chairs
Here are a few examples of what I could have done.  It's amazing what a tiny shift can do to change how the piece is interpreted.  Seeing these photoshopped together I have an urge to do a series of based on chairs!


Gluing
When I've decided on the final composition I sand and apply a thin line of glue to the bowl's rim.  Then I gently place the silk on the bowl.  This part requires a lot of precision because you can only do it once.  I can probably wash the glue off before it dries and redo this step, but the fabric might warp from the moisture or I risk damaging the embroidery in the washing process.  I use a PH neutral PVA glue, it's used in a lot of bookbinding applications.  It's archival, dries flexible, won't yellow or crack and has great adhesion properties.  I've used this glue since 2005(?)... and my first few pieces still look the same, no apparent aging/yellowing or cracking. 

I've read up on a few discussions on how all PVA glue (white glue AKA Elmer's Glue) are the same.  I assure you they are not!  There are definitely professional grade glues that are safe for your work and others that are cheapo's.  PVA glue is probably the least toxic as opposed to epoxies.

more gluing
I brush on an additional layer of glue to the silk surface, this insures even coverage.  I let the glue dry for a few hours and trim the excess.  And that's all folks!

My Mother's Mother
This is the finished piece.

Friday, March 26, 2010

3000 Yards And Counting!

3000 Yards and Counting!
I haven't kept track of how many pieces I've made, but I do keep track of how many spools of thread I go through.  I'm almost done with a 3000 yard cone of thread!  I started with this cone in 2007... I've since switched to Gütermann's polyester threads for my main embroidery and reserve the big cone for the "hair" in my work.  I'm very happy with the quality of their threads.  It doesn't fuzz or fray even when I undo the stitching several times to rework my lines.  It's also just thick enough for my purposes... I get really nice clean lines out of it.  I've gone through 2 of the Gütermann 250 meter spools within the last year, so I guess it's 3500 yards and counting! 

Thursday, March 25, 2010

Embroidery FAQ Part 1

The plate
The most asked question I get is, "How do you get the drawing on the bowl?"  So I decided to document the making of piece from start to finish.  This is a current commission I'm working on for Kathie.  The square bowl belonged to her grandmother, who received it from her mother. 

sketch for Kathy
I usually start by sketching on a sheet of drafting velum.  When I'm happy with the sketch I overlap it with the dishware and move it around to select my composition.  Then I mark the boundary of the porcelain by rubbing a crayon along the edge.  This mark tells me where to embroider.

_MG_6005
A piece of silk is pinned to the velum and I embroider on silk.  I like to slip white paper under the velum to help me see what I'm doing.  I don't use a hoop or stretcher, they tug at the fabric too much.  It took a lot of practice stitching to get the right tension so I don't warp the fabric too much.  Although there will always be some amount of wave and puckering, it's all a part of the artwork.  The fabric also tends to "breath", changing as the humidity and temperature changes.  Sometimes there's more slack and other times it's tight as a drum skin.  But most of the time these changes aren't noticeable. 

Stitch work
A close up shot of the stitching.  Most of the linework is done with a simple running stitch.  Because the fabric is so sheer there's no need to double back to create a solid line.  *Doing a running stitch on a solid fabric would look like a dotted line.*  This method of working reminds me a lot of contour line drawing exercises back at school.


Click here for Part 2!

Wednesday, March 10, 2010

From Sketch To Prototype

At the drawing table
A little peek behind the curtains at the making of a plush doll.  I will be sending few dolls to Gallery Hanahou in May.  It's for their Lost At Sea show, curated by Kirsten Rask of Schmancy.

The creation process usually starts with design sketches or doodles.  From there I make a full-sized drawing to get a sense of the proportions. I found the easiest way to make my pattern is to cut directly from the full-sized drawing, adding a 1/4" to 1/2" seam allowance. This is where I make most of my adjustments and corrections, trimming and redrafting each piece/panel to achieve the desired form. The shaping and fitting phase is probably the most frustrating part, I had to walk away and eat a cup of pudding a few times...

Take 2
This is one of the mock-ups along side the original sketch.  This mock-up is made from the 5th or 6th head shape and 2nd body shape I've tried.  I use muslin or thrift store bed sheets as the base fabric for the mock-ups, no sense in wasting good/expensive yardage. 
**however different fabrics behave differently.  Sometimes adjustments in the pattern is needed to accommodate for the final fabric.

Full sized sketch
Full-sized drawing on tissue, I also like using drafting velum for this purpose.

Doll and pattern
The finalized pattern and prototype. There are minor adjustments I'll make from here, but all-in-all the dolls will look like this when I'm done.

Version 3.0
Testing how photogenic she is... as well as playability. :)
I think we'll call her Wabi-chan.  Since she's a prototype, she's quite imperfect... I thought Wabi (Wabi-Sabi) would be fitting.

Wednesday, June 10, 2009

Monkey Business

Can you guess?
A currently project. I've always wanted to make a set of Chinese Zodiac figures. With this series I'm trying to push for more detail, make them cleaner and tighter.

Monkey
The Monkey

Friday, May 8, 2009

Behind the Scenes

Here are some fun shots of production of the US Cellular commercial in Santa Monica. Wish I had more time to spend in the city, I'll have to comeback.

Cleaning up the molds
I'm cleaning the seam-lines of the molded crayons and getting them ready for their closeup/melting doom!
photo by Kevin Berve


Setting The Stage
Kevin Berve and his assistants putting all of the crayons in place. They were set with glue from glue sticks. I was surprise they held up, not a permanent application, but it did very well.

SO MANY CRAYONS!
These were the drones. Made from silicone molds taken from the originals I did. There were hundreds! I kept a few and a few went to the crew, the rest were destroyed (no Ebay for these guys). :P Here are some of the other crayons:

Precarious
The entire platform with hundreds of crayons was lifted and carried into place. Some careful & precarious maneuvering involved.

Here it is!
My originals were in front and the background crayons were the copies.


How it looked
I love seeing this set up... so complex. My first time on set, I definitely have a greater appreciation for stage/film production. These folks work very hard. The day started for most at 7am, some earlier and doesn't end until 6 or 7pm... sometimes later depending on what had to get done. So basically you go until the job is done. I do that when I have a crunch time as well, but I can't imagine having this schedule as a daily job. On the other hand the food was AMAZING!!! We were very well fed. :)

Lights
Another view of the set-up.

Melted Close-ups
The aftermath. Photo by Kevin Berve

Before and Aftermath

Saturday, January 31, 2009

What I'm Working On

What I'm working on
I've been carving crayons like MAD! I have a show in March in LA... more info to come... and one really BIG commission.

This is my workspace, also my kitchen table. It's a bit frustrating working from home. There are so many distractions, but it's also cheaper than a studio and very convenient! I can work at 2am... 4pm... anytime I want to and with no commute. I've considered renting a studio space for years, but in Seattle it's impossible to find an affordable space. Sometimes I think I'm holding myself back by not having a proper studio. But I'm doing alright... there's always an element of second guessing with being an artist. That's why I like to do things last minute, that way I don't get to think about it too much. I tend to over analyze and kill ideas before they have a chance to manifest. I've also learned from a few good friends to just "work" and let it come out. (Thanks Robert!)

My corner
Another shot of the workspace. I also have a "dirty" space, i.e. the garage, for sanding, cutting and anything that requires good air circulation.