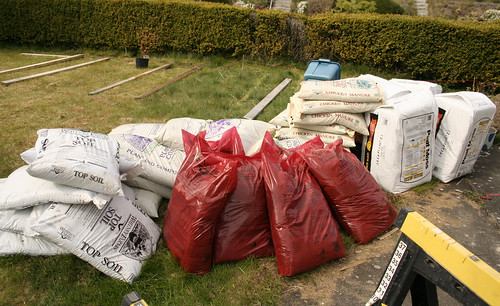
This is what a broken back looks like! We hauled about 70 cubic feet worth of compost, manure, peat moss and top soil up 10 steps and into our back yard. I'm so thankful the old owner left his wheelbarrow behind. It saved the day! This is about $200 worth of soil and 3 trips in the Prius.
You can calculate how much soil you need by multiplying your bed's height, width and length. Mine is 4x8x1= 32 cubic feet of soil is needed per bed (times 3 beds is 96 cubic feet). I'm going to mix in some fill dirt that was left by the south side of our house. The fill is clean and mostly sand.
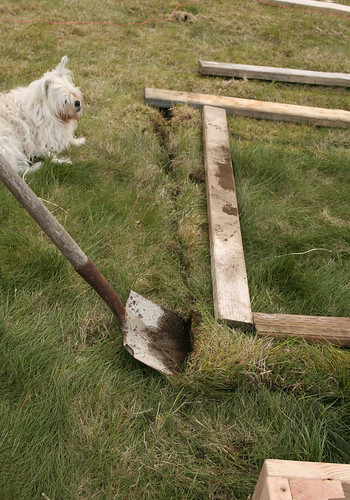
Today was the ground breaking and back breaking day. This is the no-fun part and I would totally recommend renting a rototiller. I started by marking out where the beds will go and used a shovel to cut a perimeter. This gives me a nice clean edge. I've dug 2"-3" wider than the bed's dimensoins to make sure I clear all of the grass around it.
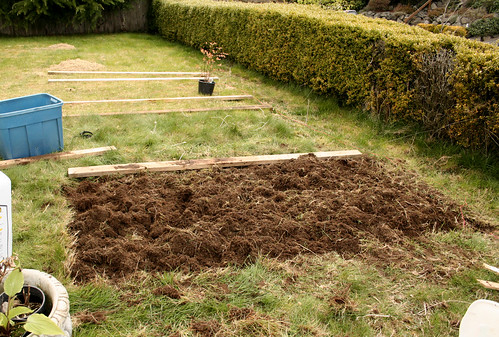
The next step is to till it. This is just plain ol' elbow grease. Nothing makes it easier... I used a Japanese garden hoe similar to this one from JapanWoodworker, but with a longer handle. I found that angle and ergonomics was good for me.
This is where I stopped today, we started at about 11am with buying and hauling soil and I stopped working at about 7pm. We took 2 hours off to each lunch and wander through the Ballard Farmer's Market. So for about 6 hours of work I got 1.5 beds tilled and all of my soil brought on site. My husband and I did the hauling together, but I worked on the tilling by myself. So you can gage the amount of work it takes to prepare for a raised bed.
There are lots of different methods used on how to build a raised bed (and how to prepare the soil). You just have to pick the one that you have the energy and resources for. I'm going to experiment with a few methods in each box.
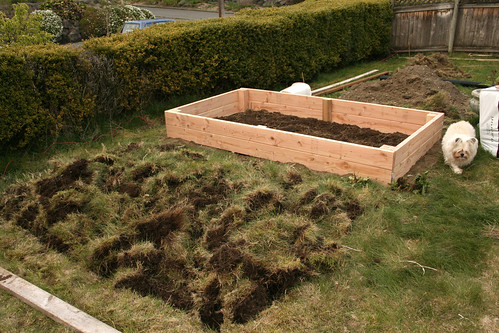
This is my first bed. I've removed the sod and tilled it. I started with the 2 steps above (cut the perimeter and a rough till). After breaking the sod into big chunks I shook out soil and tossed the sod aside. In most of the forums I've read removing the sod is unnecessary. I just did it for the hell of it. At this point it's ready for the raised bed frame. Tilling and preparing this patch took about 2 hours and 30 minutes.
*To get the dirt out from the sod I beat clumps of it against a 2x4. Lots of dirt went flying everywhere, my hair, my eyes, my mouth... not fun. Not the best way to do this.
I won't be removing the sod in the other 2 bed. I will double dig my 2nd bed (started and half-way done) and I'll just lay newspaper over the sod on the 3rd bed. These are both methods that others have used and said works. I'd like to see which 3 method is best at promoting plant growth and inhibiting weed/grass growth in the beds. I'd like to see what the easiest & most efficient way is. I'll have more info on the other 2 beds tomorrow (weather permitting) and I'll keep you guys posted throughout the season.
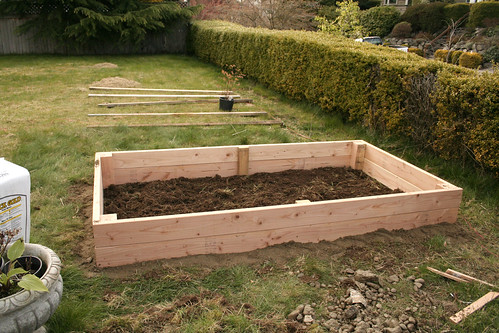
This is the first bed with frame installed. After tilling we lowered the frame into place, filling in any low points and making sure it was level. We lifted the frame up again to dig a small trench where the frame was. You'll see an indentation/footprint in the soil, just dig an inch or 2 slightly larger than that footprint. Fill it with gravel for drainage. I forgot to buy gravel this morning, but I had a bucket of small rocks laying around. I packed the rest with the sandy fill dirt I had (not as good as gravel for drainage). This drainage trench will help keep your wood dryer. It'll still rot eventually, but this gives you some extra time.
Lower the frame onto your gravel once again and pack the outer perimeter with soil. I just shoveled some fill dirt all the way around the walked on it. You're pretty much just setting it into place.
*Where I live I'm not so concerned with digging critters so I didn't install chicken wire under the frame. If you're concerned with moles or rats, rabbits etc. you should do so. This bed is ready for soil. I'm waiting to fill all 3 at the same time.
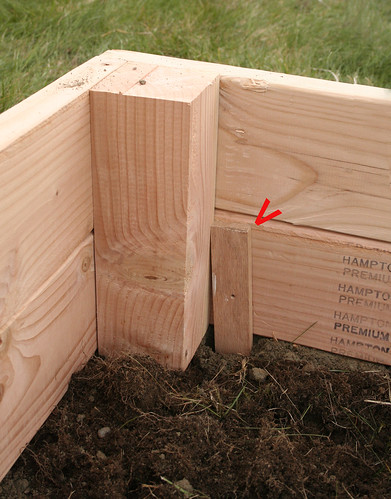
I don't know if this is necessary either, but I staked all 4 corners of the frame into the ground. This keeps it from moving around, but I assume once it's been loaded with soil it's not going anywhere.
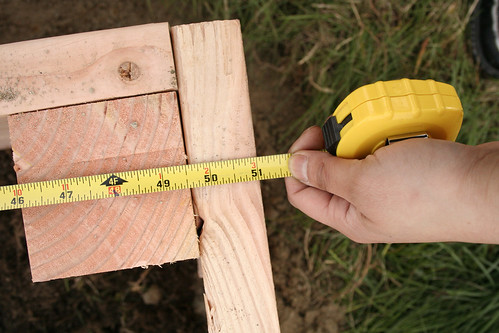
Today I realize that 4' across is pretty wide, especially given the extra lumber widths making it a total of 51" wide. I'm on the shorter side and I can tell reaching the middle is going to be a hassle. If you're shorter or have back issues I'd go with 3' or 3.5' wide beds.
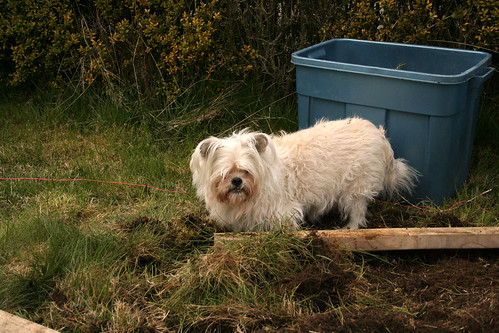
Just in case you guys are wondering. This is Guy, my supervisor.
Your beds are much neater than mine! I just used cardboard on the bottom of mine and surprisingly the weeds are rare and easy to pull out. Do you have a soil place that will deliver at all? We got ours in a great big truck, the soil was much better quality than some we had bought in bags at the local garden centre, which mainly seemed to be wood chips. The problem is if they cant get the truck to the spot, its you and a wheelbarrow again. How exciting, wait till you get growing, its just the best.
ReplyDeleteThanks Christina :) I looked into the soil delivery thing... but our house sits up from the street and there's no driveway up to the yard. You have to walk up 10 steps. They would have dumped the soil on the sidewalk and carrying soil w/o bagging would have been too messy.
ReplyDeleteI had some big chips, but it wasn't bad this time. I know what you're talking about... it almost looks like you bought a bag of mulch instead of soil!
I really wanted to pin your site because I'm new at gardening and I wanted to put it on my gardening board so I'd remember how you did it. I was wondering why your pictures weren't "pinable"? Thanks!
ReplyDeleteThanks for visiting the blog Deborah. I'm not sure, I host my images off Flickr... maybe it's a setting I have from that site? I'll ask a web-savvy friend and get back to you.
ReplyDelete